A Rainy Afternoon Still Life Made from Things on the Table
A rainy afternoon still life turns a few table-top objects into a focused drawing, using one viewpoint and clear overlaps to organise the page.
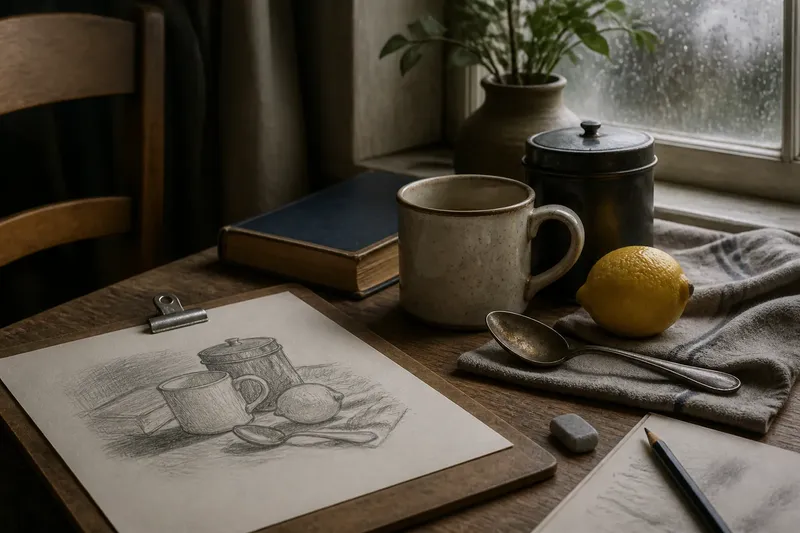
The most common still-life snag is choosing too many objects, then losing the hour to rearranging them. A rainy afternoon still life works better with a few things already on the table: a mug, a spoon and a folded napkin can give you a whole page to study.
The point is not to make a polished inventory of household belongings. It is to notice how shapes meet, hide one another and sit against the edge of the table. Pick one viewpoint, keep it, and let those overlaps guide the drawing.
What should you draw for a rainy afternoon still life?
Choose three or four objects with different shapes and heights, preferably items you can leave where they are. A cup beside a small jar and a pear, for instance, gives you curves, straight edges and a shape that is neither perfectly round nor box-like.
Look for objects that are easy to distinguish from one another. A pale bowl against a light tabletop may disappear at its edge; place a darker book behind it, or choose a surface where the outline reads clearly. Everyday objects are useful because their shapes are familiar, but try to draw what you see rather than what memory says a cup or fruit ought to look like.
A few handy materials are enough:
- Drawing paper, ideally secured to a board or a firm book.
- A graphite pencil and a soft eraser.
- A fineliner, if you want a committed line rather than a changeable one.
- A chair or cushion that lets you hold a steady position.
- A scrap sheet for trying marks before they reach the drawing.
Keep the materials within reach before settling into your viewpoint. A small adjustment to the pencil or paper is easy; leaning across the arrangement can shift an object and alter the very overlaps you are trying to observe.
How do you arrange ordinary objects on a table?
Begin with one object that feels like the anchor: perhaps the mug, a tin or a small bowl. Put another item partly behind it, not simply beside it, so the shapes overlap. Add a third object to one side, then pause and look for a clear outline around the group.
Move the objects, not your chair, while arranging them. Avoid lining everything up like products on a shelf. A slight change in distance can make the arrangement feel connected: the rim of a spoon might point towards a jar, or a folded cloth might lead the eye back to the main object.
Check the gaps as well as the objects. The triangular patch between a mug, a book and the table edge may be as distinctive as the mug itself. If every gap looks narrow and similar, shift one object until the spaces become easier to tell apart.
Which viewpoint should you use for a tabletop still life?
Choose a position where you can see the shapes clearly and stay comfortable. Sitting at table height may show the side of a cup and the curve of its handle; standing above it may reveal the opening and the arrangement of objects on the surface. Neither view is automatically better—the useful one is the view you can hold while drawing.
Say you arrange a mug, a small tin and a lemon on a kitchen table. From your chair, the tin hides part of the lemon, while the mug handle makes a loop against the wall; if that arrangement is visually clear, draw from the chair rather than shifting upwards to reveal every object.
Mark a small reference point on the table, such as the corner of a placemat, so you can return your gaze to the same place. Keep your paper at a comfortable angle and glance between the scene and page without twisting. A stable position makes comparisons easier, especially when you are judging whether one edge slants or curves.
How can overlaps organise the drawing?
Start by lightly placing the largest shapes on the page. Use simple outlines—an oval for a bowl, a long block for a book, a loose pear shape for fruit—before adding handles, labels or small details. Check that the whole arrangement fits, including the visible tabletop and any space above the tallest object.
Then follow the overlaps. Where one object passes in front of another, draw the nearer contour and stop the hidden contour at the meeting point. This small decision keeps the objects from looking as if they have been drawn on separate layers with no contact.
Work around the arrangement instead of finishing one object at a time. If the mug overlaps the book and the book sits behind the fruit, compare all three relationships before darkening any line. You can erase a tentative mark, but it is easier to notice a misplaced shape while the drawing is still simple.
Next, look at the table and background as shapes too. A sliver of wall between a cup and a jar, or the angled edge of a placemat, helps locate the objects. Add only the setting that clarifies the composition; a full kitchen scene is not needed.
How much detail belongs in a rainy afternoon still life?
Detail should help explain shape or material. A short curved line can describe the lip of a cup; a few changes in pressure can suggest the soft fold of cloth. Repeatedly tracing the same outline usually makes it heavier without making it more informative.
Choose a few places for darker marks, such as the shadow beneath a bowl or the opening of a jar. Let lighter areas remain open. If you are drawing with graphite, vary pressure gently; with a fineliner, use broken lines or hatching on a scrap first so you can see how the marks behave.
Texture is optional. A lemon does not need every dimple, and a woven napkin does not need a grid of tiny strokes. One or two well-placed clues can suggest the surface while keeping the attention on the arrangement.
What should you do if the drawing feels wrong?
Pause before adding more marks. Compare the largest distances: the gap from the left edge of the page to the first object, the height of the tallest object, and the space between the overlapping shapes. A drawing can feel unsettled because one broad proportion is off, even when its details look convincing.
Try checking the scene as a set of simple silhouettes. Squint slightly or look at the drawing from a short distance; small features fade, leaving the overall balance more visible. If two objects merge into one shape, clarify their meeting edge or adjust the value of the shadow between them.
If the arrangement has shifted, decide whether to restore it or accept the new view. Do not quietly combine the old and new positions: that can make the contours disagree. For a relaxed study, either choice is fine as long as you draw the scene you can actually see.
Can you draw a still life without a finished-looking result?
Yes. A still life can be a record of looking rather than a display piece. Leave construction lines visible, stop before the page feels crowded, or use a spare sheet to make a second, looser version of the same arrangement.
When you finish, note one thing that helped you see the objects more clearly: perhaps the gap beneath the handle, the angle of the table edge or the way the fruit interrupted the jar’s outline. That observation gives the next rainy afternoon still life a useful starting point, without turning a quiet drawing session into a test.